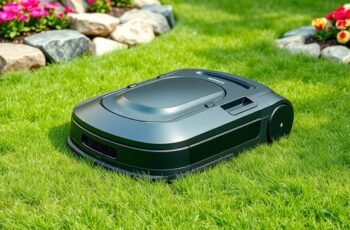
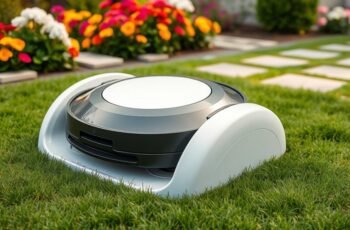
Maintaining clean charging contacts on a robot mower is critical for ensuring reliable operation and preventing unexpected downtime. We recognize that dirt, corrosion, and debris can impair contact quality, leading to inefficient charging and potential hardware issues. Proper cleaning techniques involve specific tools and careful procedures to preserve contact integrity. If you want to avoid persistent charging problems and extend your mower’s lifespan, it’s crucial to follow precise maintenance steps—details that can make all the difference.
Key Takeaways
- Power off the mower and disconnect the battery before cleaning to prevent electrical hazards.
- Use a soft brush and isopropyl alcohol to gently remove dirt, corrosion, and debris from contacts.
- Wipe contacts with a lint-free cloth and ensure they are thoroughly dry before reassembling.
- Inspect contacts regularly for signs of corrosion, damage, or high contact resistance, and clean or replace if needed.
- Maintain a routine cleaning schedule and apply contact cleaner or dielectric grease to prevent future contamination.
Why Cleaning Robot Mower Charging Contacts Matters
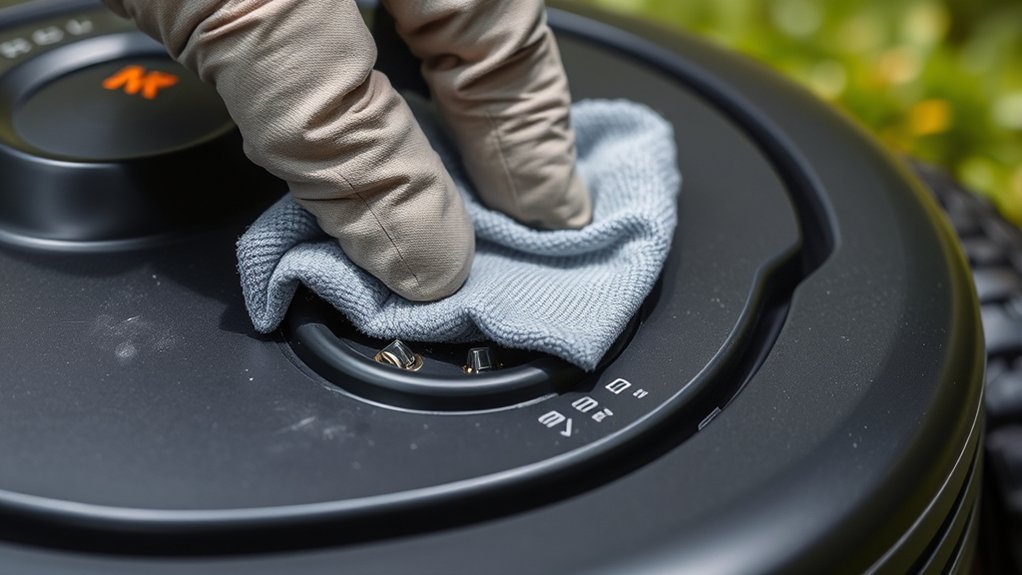
Cleaning the charging contacts on a robot mower is essential because dirty or corroded contacts can considerably impair the device’s ability to establish a reliable electrical connection. Poor contact quality leads to inefficient charging, which directly affects battery lifespan, causing premature degradation and reduced run times. Consistent cleaning guarantees ideal electrical conductivity, maintaining the mower’s performance and longevity. Additionally, clean contacts facilitate smooth software updates by enabling proper communication between the mower’s control system and charging station. Corrosion or debris can interrupt data transfer during updates, risking software malfunction or outdated firmware. Regular maintenance of the contacts preserves both the hardware’s integrity and the device’s ability to operate at peak efficiency, ultimately extending its service life and ensuring reliable, trouble-free operation.
Recognizing Signs of Poor Contact and Charging Issues
We monitor for visible corrosion or debris on the contacts, as these can disrupt electrical continuity. Charging light indicators also provide real-time feedback; inconsistent or absent signals often point to poor contact. Identifying these specific signs enables targeted troubleshooting to restore reliable charging.
Visible Corrosion or Debris
Visible corrosion or debris on the charging contacts is a clear indicator of poor electrical connection, which can lead to charging failures or reduced battery performance. Such contamination impairs the transfer of power, directly affecting mowing efficiency and battery longevity. To address this, we should:
- Inspect contacts regularly for signs of oxidation or dirt buildup.
- Use a non-abrasive cloth or brush to remove loose debris.
- Apply a contact cleaner or isopropyl alcohol for stubborn corrosion.
- Ensure contacts are completely dry before reassembling.
Maintaining clean contacts ensures optimal electrical conduction, preserving battery performance and maximizing mowing efficiency. Recognizing and addressing visible corrosion promptly prevents larger charging issues and extends the lifespan of the mower’s components.
Charging Light Indicators
Charging light indicators serve as critical real-time feedback tools that help us identify potential issues with the mower’s electrical connection. When these lights flicker, stay off, or remain solid during charging, it signals possible poor contact at the charging contacts, which can compromise battery lifespan and reduce mowing efficiency. A dim or inconsistent charging light often indicates suboptimal electrical connection, leading to incomplete charging cycles. Over time, poor contact can accelerate battery wear, shortening overall lifespan and causing inconsistent cutting performance. Regularly monitoring these indicators allows us to detect early signs of contact deterioration. Ensuring proper contact cleaning and alignment maintains reliable charge transfer, preserving battery health and optimizing mowing efficiency. Accurate interpretation of charging light signals is essential for proactive maintenance and consistent mower operation.
Tools and Materials Needed for Effective Cleaning
To guarantee the charging contacts on your robot mower are thoroughly cleaned, assembling the right tools and materials is essential. Proper cleaning ensures ideal battery capacity and consistent performance, regardless of mowing patterns. First, we recommend a soft-bristled brush to remove debris without scratching contact surfaces. Second, use isopropyl alcohol (at least 70%) and a lint-free cloth for effective disinfection and residue removal. Third, have a small screwdriver on hand to access contact points if needed. Finally, a pair of tweezers can help dislodge stubborn dirt or dust particles lodged in tight spaces. These tools enable precise, effective cleaning, preventing corrosion or corrosion-related connection issues that impair mowing efficiency and battery longevity.
Step-by-Step Guide to Cleaning Your Robot Mower’s Charging Contacts
First, we identify any dirt, oxidation, or corrosion on the contacts using a magnifying glass and proper lighting. Next, we gather specific cleaning tools such as a non-abrasive cloth, isopropyl alcohol, and a soft brush to guarantee effective cleaning without damage. Finally, we follow a precise cleaning technique: gently remove debris, apply alcohol to dissolve oxidation, and carefully wipe the contacts dry to restore ideal electrical connection.
Identify Dirty Contacts
Since dirty or corroded contacts can disrupt the electrical connection between the robot mower and its charging station, it’s essential to identify these issues before attempting to clean them. First, visually inspect the contacts for signs of contact corrosion—white, greenish, or bluish deposits indicating oxidation. Next, check for any dull or rough surfaces that might hinder conductivity. Third, monitor the charging indicator; inconsistent or failed charging cycles often point to dirty contacts. Fourth, observe the battery lifespan; a noticeable decrease may result from poor contact quality. Identifying these signs helps determine if cleaning is necessary to restore proper electrical flow, ensuring ideal performance and extending the mower’s battery lifespan.
Gather Cleaning Tools
Gathering the appropriate tools is a critical initial step to guarantee a safe and effective cleaning process for your robot mower’s charging contacts. A well-prepared toolset supports adherence to your cleaning schedule while preserving contact durability. Here’s what you’ll need:
| Tool | Purpose |
|---|---|
| Microfiber cloth | Gently wipes contacts without scratching |
| Isopropyl alcohol | Disinfects and removes stubborn grime |
| Soft-bristled brush | Loosens debris in small crevices |
| Rubber gloves | Protects hands from chemicals and dirt |
Using these tools ensures precise cleaning, minimizes contact damage, and extends the lifespan of the contacts, aligning with your maintenance routine.
Proper Cleaning Technique
To guarantee ideal contact cleanliness, we recommend following a systematic, step-by-step cleaning process that minimizes potential damage and ensures complete removal of debris. First, power off the mower and disconnect the battery if performing maintenance like battery replacement. Next, dampen a lint-free cloth with isopropyl alcohol and gently wipe the charging contacts, ensuring removal of dirt and oxidation. Third, use a soft-bristled brush to clear any stubborn debris lodged in contact grooves. Finally, inspect the contacts for corrosion or damage before reinserting the battery or powering on. Regular cleaning ensures reliable charging, supports smoother software updates, and prevents charging failures. This meticulous approach safeguards the contacts, maintains excellent electrical conductivity, and prolongs the mower’s operational lifespan.
Tips for Preventing Dirt and Debris Buildup on Contacts
Regularly inspecting and cleaning the mower’s charging contacts is essential to prevent dirt and debris buildup that can impair electrical conductivity. Accumulated dirt reduces contact surface area, leading to poor electrical transfer, which directly impacts battery life and mowing efficiency. To minimize buildup, we recommend wiping contacts with a lint-free cloth and using a small brush or compressed air to remove stubborn debris. Applying a light coating of contact cleaner or dielectric grease can also inhibit future contamination. Ensuring the contacts stay clean helps maintain best charge transfer, supporting consistent battery performance and prolonging operational intervals. Regular maintenance not only safeguards the mower’s electrical system but also preserves overall mowing efficiency by reducing the risk of incomplete or interrupted charging cycles.
When to Consider Professional Maintenance or Contact Replacement
Although routine cleaning addresses minor contact issues, there are times when professional maintenance or contact replacement becomes necessary. Signs include significant deterioration of charging contacts, persistent charging failures, or inconsistent power transfer despite cleaning efforts. Additionally, monitor the battery lifespan; if the mower’s runtime diminishes substantially, it may indicate worn contact points or aging components.
Replacement criteria involve evaluating contact corrosion severity, physical damage, or corrosion that cannot be cleaned effectively. If contact resistance remains high after professional inspection, replacement of the charging contacts or entire docking station might be required. Finally, consider the overall age of the mower—if it surpasses manufacturer-recommended service intervals, proactive contact replacement guarantees efficient operation and avoids unexpected failures.
Troubleshooting Persistent Charging Problems After Cleaning
Even after thoroughly cleaning the charging contacts, persistent charging problems can still occur due to underlying electrical or mechanical issues. If the mower continues to experience charging inconsistencies, it’s essential to evaluate the battery lifespan, as degraded batteries may fail to hold a proper charge despite clean contacts. Additionally, outdated software updates can impair communication between the mower and charging station, leading to charging faults. We recommend verifying that the mower’s firmware is current, as updates often address bugs affecting charging performance. Mechanical issues, such as misaligned contacts or damaged connectors, should also be inspected. Combining these checks with a voltage test of the charging station’s output can help isolate the root cause, ensuring that the problem isn’t related to hardware degradation or software discrepancies.
Frequently Asked Questions
How Often Should I Clean My Robot Mower’s Charging Contacts?
We recommend cleaning the robot mower’s charging contacts every 2-4 weeks to prevent contact corrosion, ensuring peak battery performance. Regular cleaning maintains efficient power transfer, prolongs battery life, and prevents operational issues caused by dirty or corroded contacts.
Can Cleaning Contacts Damage the Robot Mower?
Cleaning contacts, if done carefully with appropriate materials, won’t damage your mower; proper contact maintenance prevents corrosion and guarantees ideal battery performance, but aggressive cleaning or using abrasive tools could harm sensitive components, so proceed cautiously.
Are There Alternative Methods to Clean Stubborn Dirt?
Did you know 85% of robot mower issues stem from dirty contacts? We recommend gentle methods like soft cloths or brushes, avoiding chemical cleaners and abrasive tools, to prevent damage and guarantee precise cleaning of stubborn dirt.
What Type of Lubricant Is Safe for Charging Contacts?
We recommend using a dielectric silicone lubricant for charging contacts, as it prevents contact corrosion and is safe for electronic components. Always guarantee the lubricant is specifically labeled safe for electrical contacts to avoid damage.
How Do I Prevent Corrosion on Charging Contacts?
To prevent contact corrosion, we regularly inspect and clean charging contacts, apply a dielectric protective coating, and guarantee proper battery maintenance. These steps minimize moisture exposure, reduce oxidation, and preserve ideal electrical connection, extending mower lifespan effectively.
Conclusion
By regularly cleaning our robot mower’s charging contacts, we guarantee reliable power transfer, ideal performance, and prolonged hardware lifespan. Maintaining contact points prevents dirt buildup, avoids charging interruptions, and preserves efficiency. Consistent inspection, careful cleaning with proper tools, and prompt attention to signs of wear are essential. Ultimately, diligent upkeep not only sustains mower functionality but also minimizes costly repairs, ensuring our robotic lawn care system remains precise, dependable, and efficient season after season.